How to Build a WiFi Guest Portal (No Coding Required)
A non-technical guide to creating a branded WiFi portal with email capture, splash pages, and automated campaigns — no developers needed.
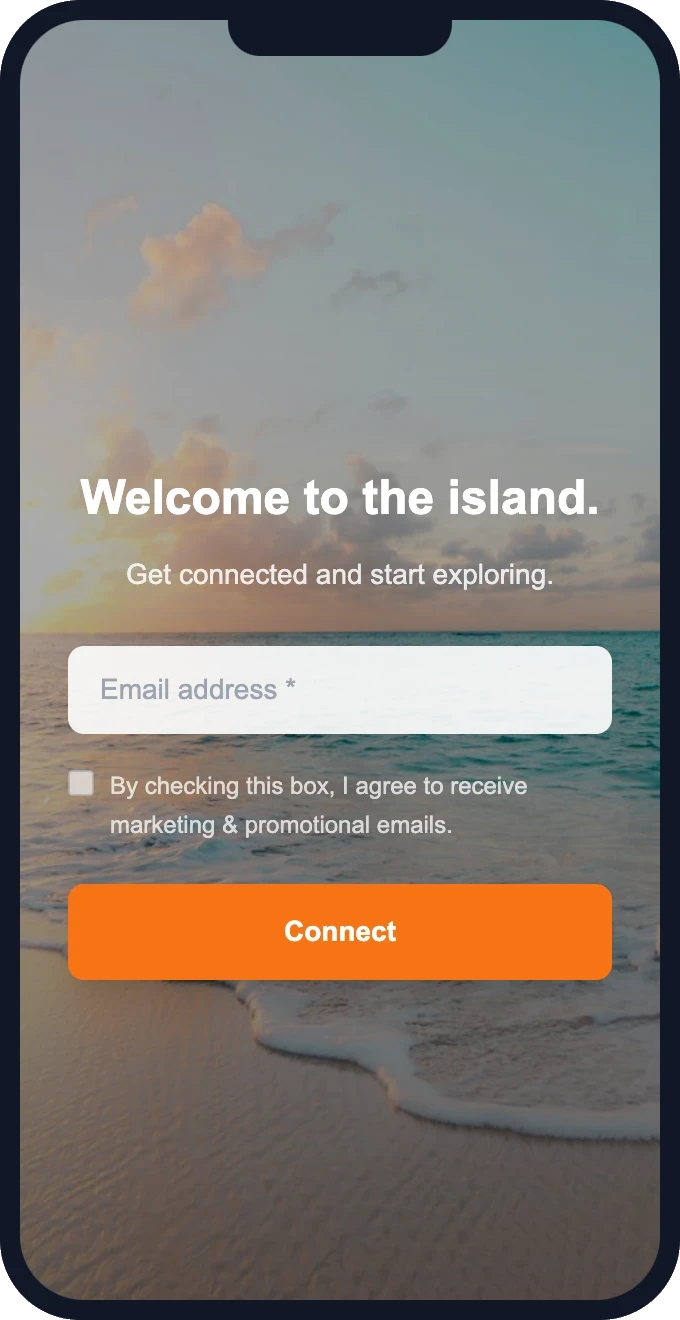
You want to capture customer emails through your WiFi. You've heard about captive portals. But you're not a developer, you don't have an IT team, and you don't want to spend weeks setting something up. Good news: building a wifi guest portal in 2024 requires zero coding. Template-based platforms handle everything from the splash page design to the email automation. Here's what's involved.
What a WiFi guest portal actually consists of
Before you build one, it helps to understand the four components that make up a complete captive portal for guest wifi:
1. The splash page (login screen)
This is the branded page customers see when they first connect to your WiFi. It typically shows your logo, a welcome message, and an email input field with a "Connect" button. This is where data capture happens. The best splash pages are clean, fast-loading, and require only one field (email) to minimize friction.
2. The post-connection homepage
After login, customers land on a custom homepage. This is your free advertising slot — links to your menu, booking page, social profiles, current promotions, or review sites. It loads every time the customer reconnects, giving you repeated exposure without any staff effort.
3. Email capture and storage
Every email entered on the splash page needs to go somewhere useful. A proper captive web portalstores contacts in a database with timestamps, visit frequency, and any optional fields you collect. It should also integrate with your existing email tool (Mailchimp, etc.) or provide its own sending capability.
4. Automated email campaigns
The capture is only half the value. What you do with the emails afterward drives revenue. Most portal platforms include basic automation: a welcome email after first connection, periodic promotions, and re-engagement messages when someone hasn't visited in a while.
Template-based vs. custom-coded portals
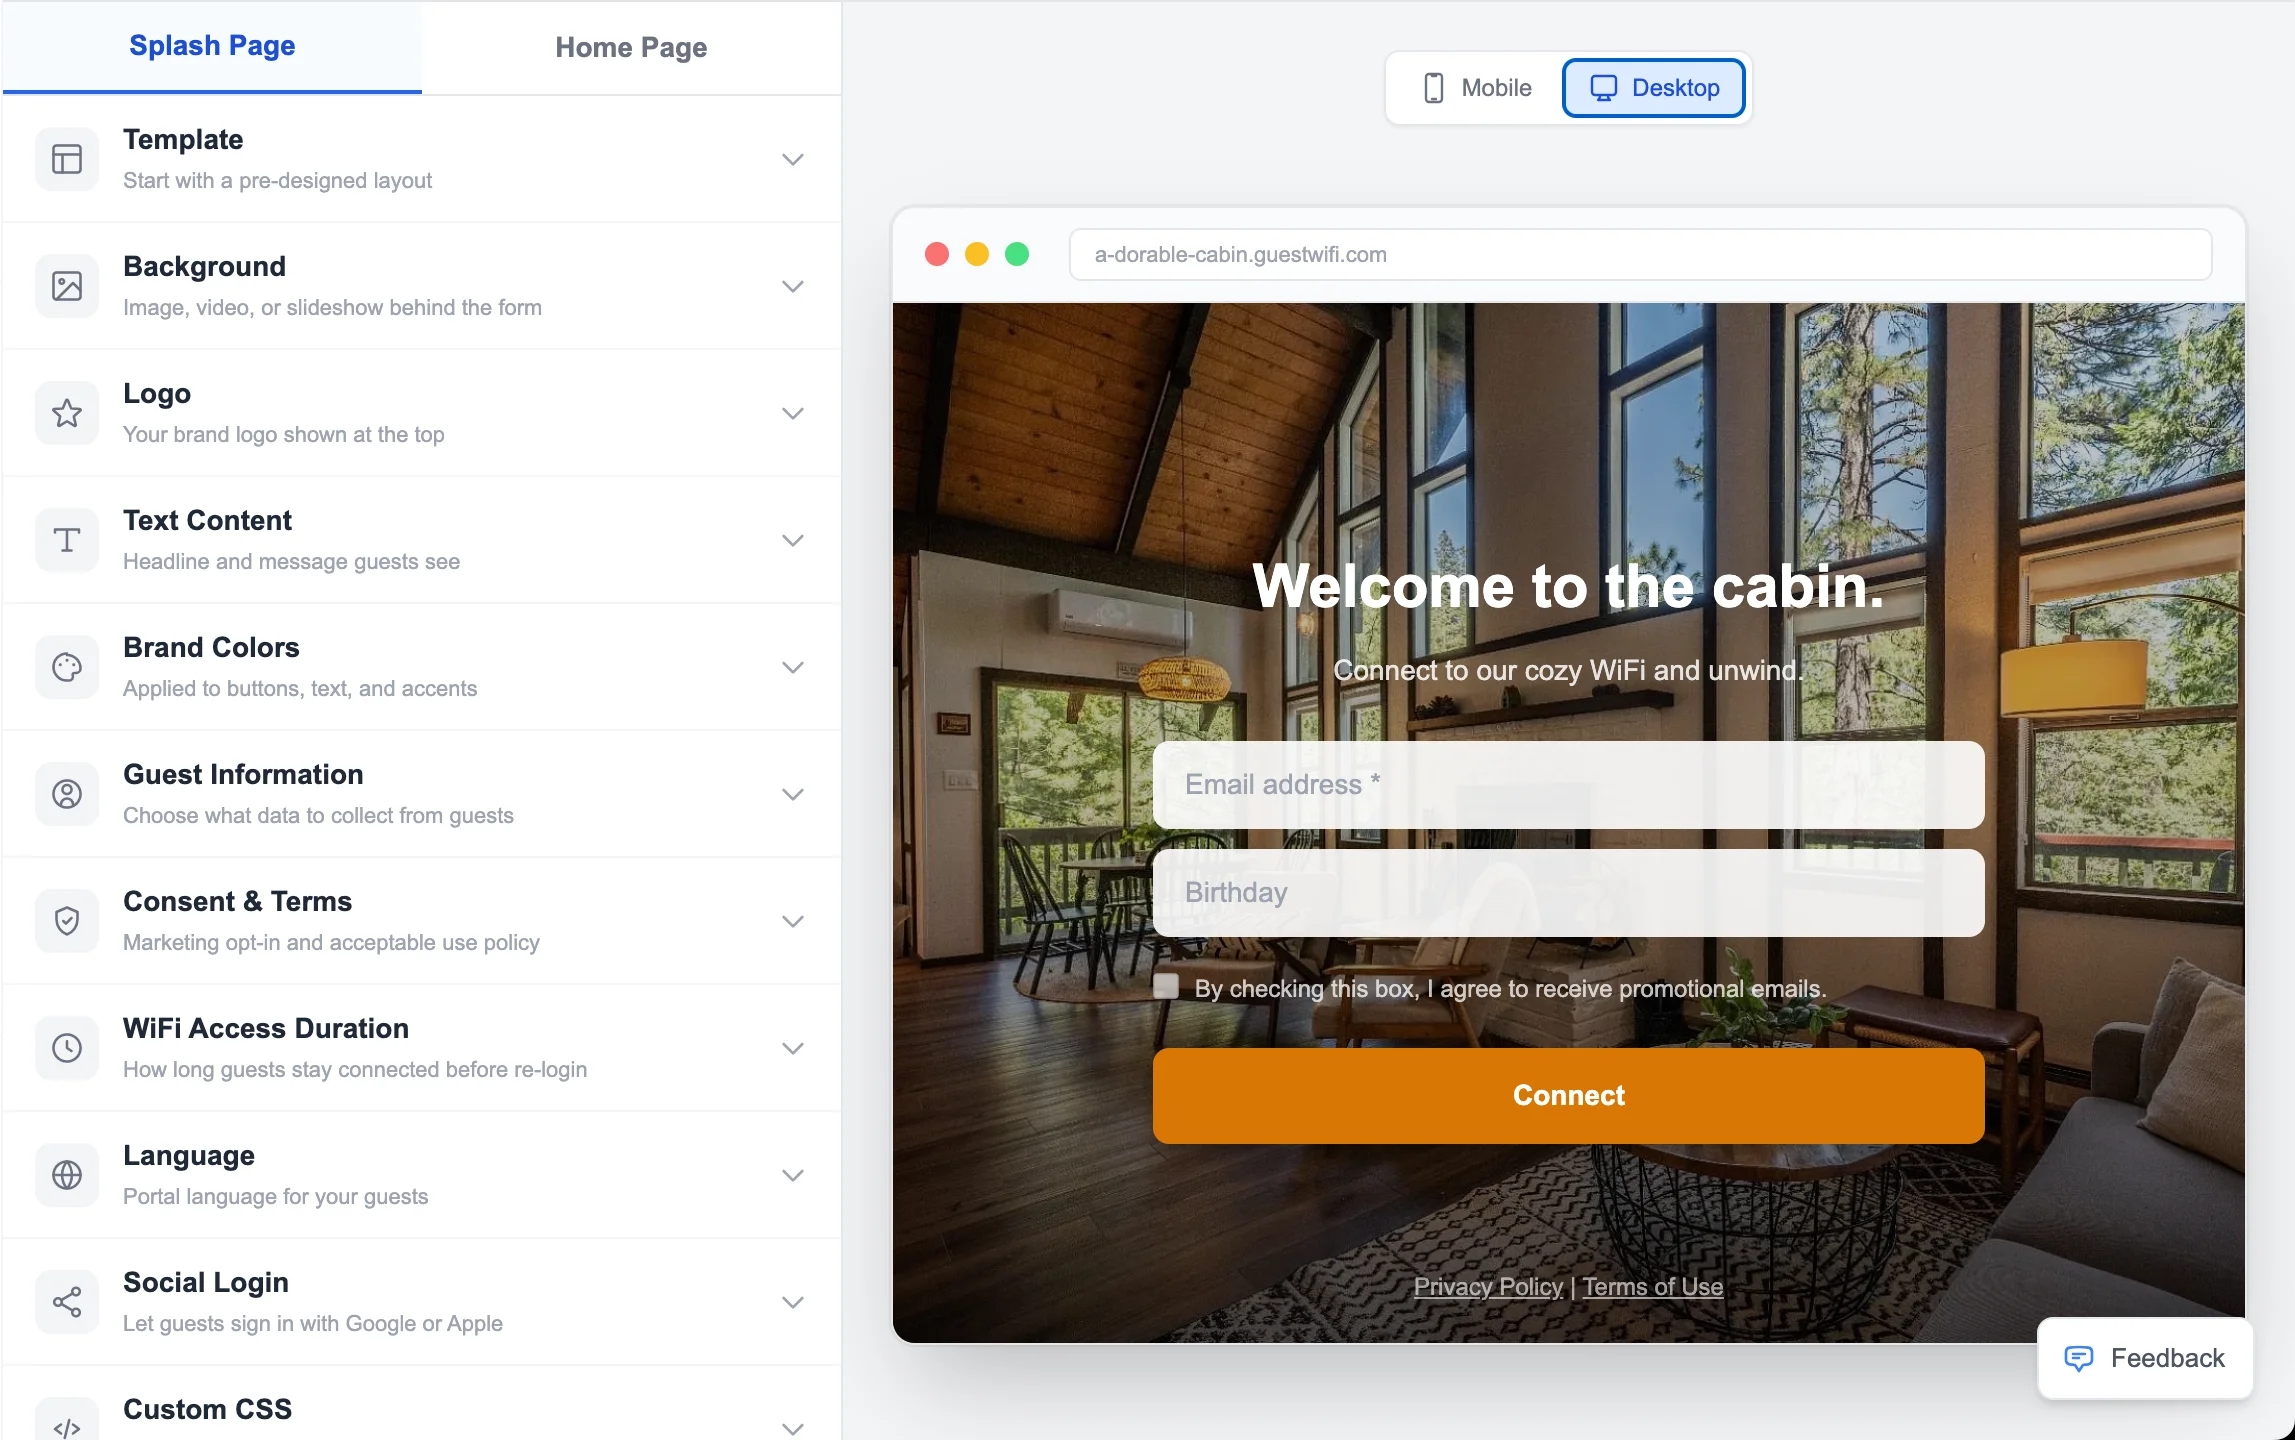
There are two ways to build a wifi portal:
Custom-coded (the hard way)
You install open-source captive portal software on your own server, configure RADIUS authentication, write HTML/CSS for the splash page, set up a database for email storage, and build integration with an email sender. This approach gives you total control but requires:
- Technical knowledge of networking and DNS
- A server to host the portal software
- Ongoing maintenance and security updates
- Custom development for every design change
- Separate email infrastructure
For most small businesses, this is overkill. It's expensive to build, expensive to maintain, and fragile when something breaks.
Template-based (the practical way)
A template-based platform provides pre-built splash page designs, a drag-and-drop editor, built-in email storage, and automated campaign tools. You pick a template, add your logo and colors, plug in your access point, and you're live. The platform handles:
- Hosting and uptime
- Mobile-responsive design
- Email storage and export
- DNS and redirect configuration
- Campaign automation
- Analytics and reporting
Total setup time: 15-30 minutes. No server, no coding, no IT department.
Ready to see this in action?
Set up takes 15 minutes. Free — we configure everything for you.
Why template-based wins for small business
The math is simple. A custom portal costs $2,000-$10,000 to develop, plus ongoing maintenance. A template-based platform costs $15-50/month and handles everything. For a coffee shop, gym, or boutique hotel, the template approach delivers 95% of the functionality at 5% of the cost.
Template-based doesn't mean generic. Good platforms let you customize colors, fonts, images, copy, fields, and homepage links. Your customers see your brand, not the platform's.
Step-by-step: building your portal
- Choose your platform — look for template variety, email automation, and hardware compatibility
- Pick a template — select a splash page design that fits your business type
- Add your branding — upload your logo, set brand colors, write a welcome message
- Configure fields — email is essential; name and birthday are optional extras
- Build your homepage — add links to your menu, booking system, socials, or promotions
- Set up automation — configure a welcome email and at least one recurring campaign
- Connect your hardware — point your access point to the portal's redirect URL
- Test it — connect with your phone and verify the full flow works
Hardware requirements
Most wifi portals work with standard access points from UniFi, TP-Link, Mikrotik, or similar brands. You don't need specialized hardware. If your current access point supports external captive portal redirect (most do), you can use it. If not, a compatible access point costs $50-$150 one-time.
Common mistakes to avoid
- Too many fields — every extra field drops conversion 10-15%. Stick to email-only.
- No homepage — skipping the post-connection page wastes your best marketing real estate.
- No automation — collecting emails without sending anything is a database, not marketing.
- Forgetting mobile — 80%+ of WiFi connections are from phones. Your portal must be mobile-first.
- Slow load times — a splash page should load in under 2 seconds. Skip heavy images.
Getting started
Ready to build your wifi guest portal? GuestWiFi gives you templates, email automation, and hardware-agnostic setup at $15/mo per access point with free configuration. Pick a template, add your brand, and start capturing emails today — no coding, no IT, no hassle.
Start capturing customer emails today
$15/month per access point. All features included. We set it up for you — free.
Get Started — Free Setup →No credit card required · Cancel anytime